Floor and Tiles · Documentation
Quick start
Creating a floor and a tiled room. The steps apply to both the object and the modifier.
Floor
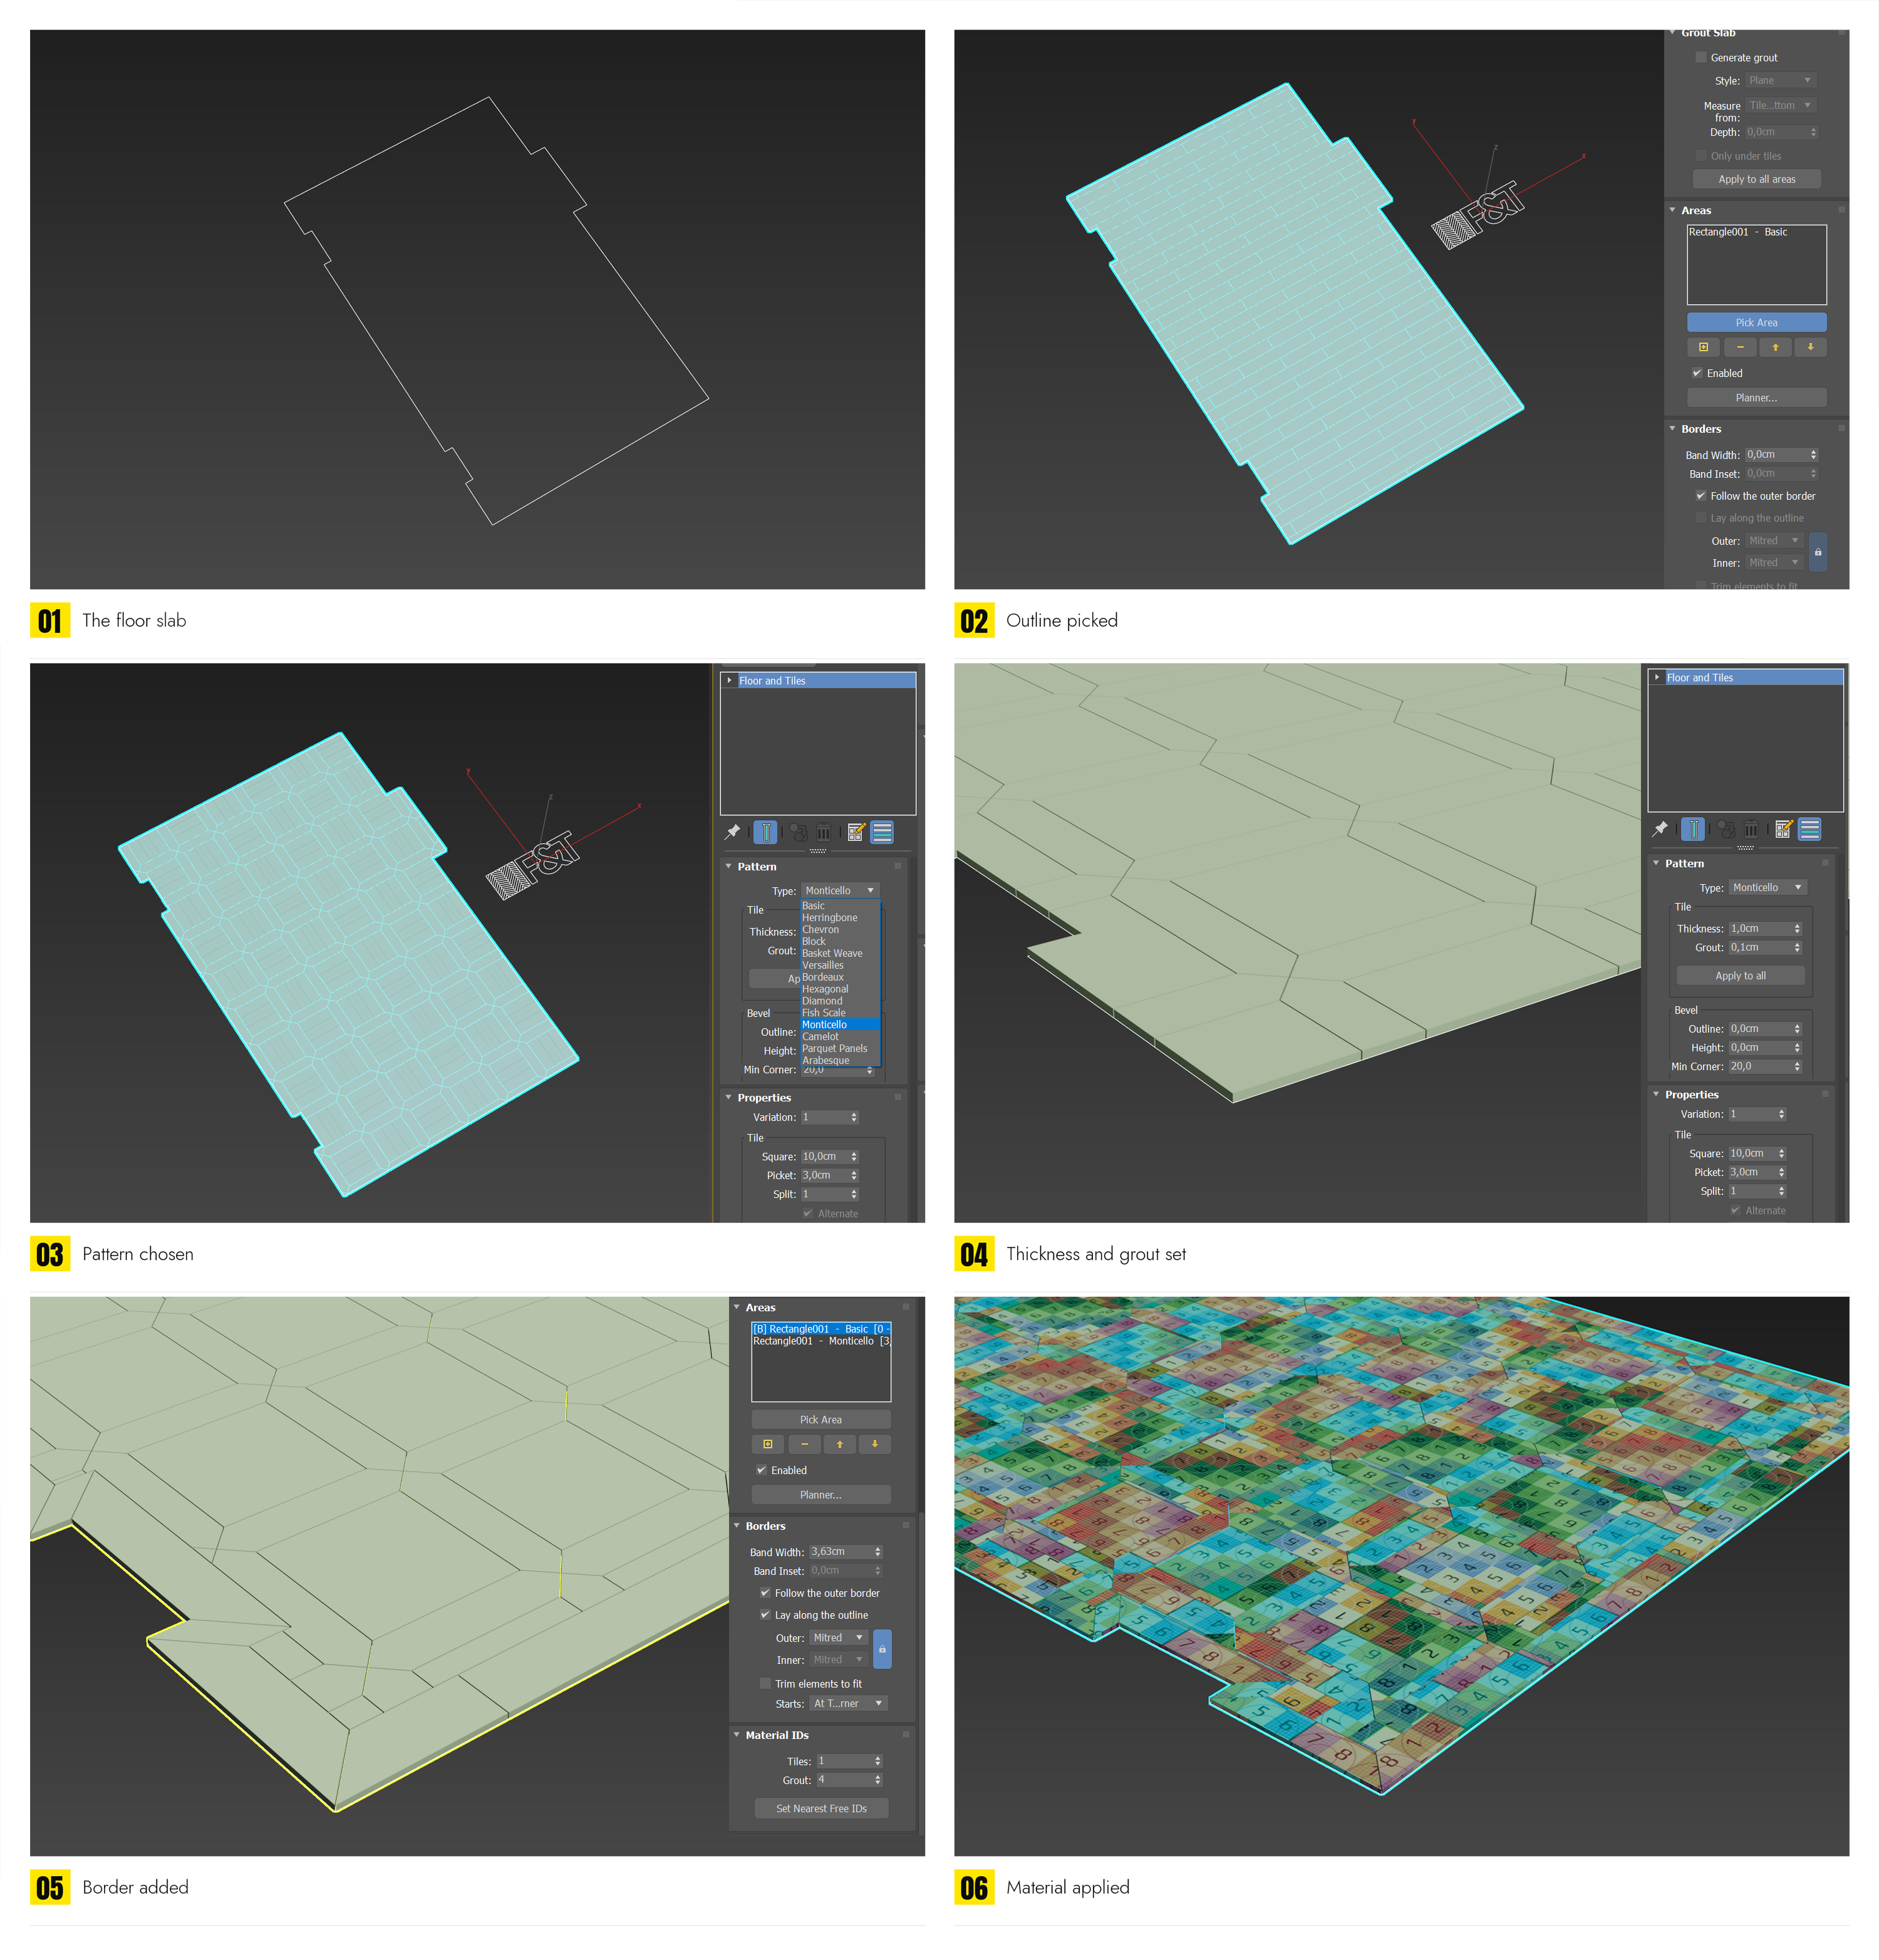
- Prepare a floor slab or a closed spline of the room outline.
- Press Floor and Tiles on the toolbar and click the slab or spline. Alternatively, apply the Floor and Tiles modifier to the slab.
- In Pattern, choose a Type. Set the element sizes in Properties.
- In Pattern, set Thickness and Grout. To fill the joints, enable Grout › Generate grout.
- In Areas, press Add Border Pro and set the border's pattern and width.
- Assign a Multi/Sub-Object material using the IDs shown in Material IDs.
Room Pro
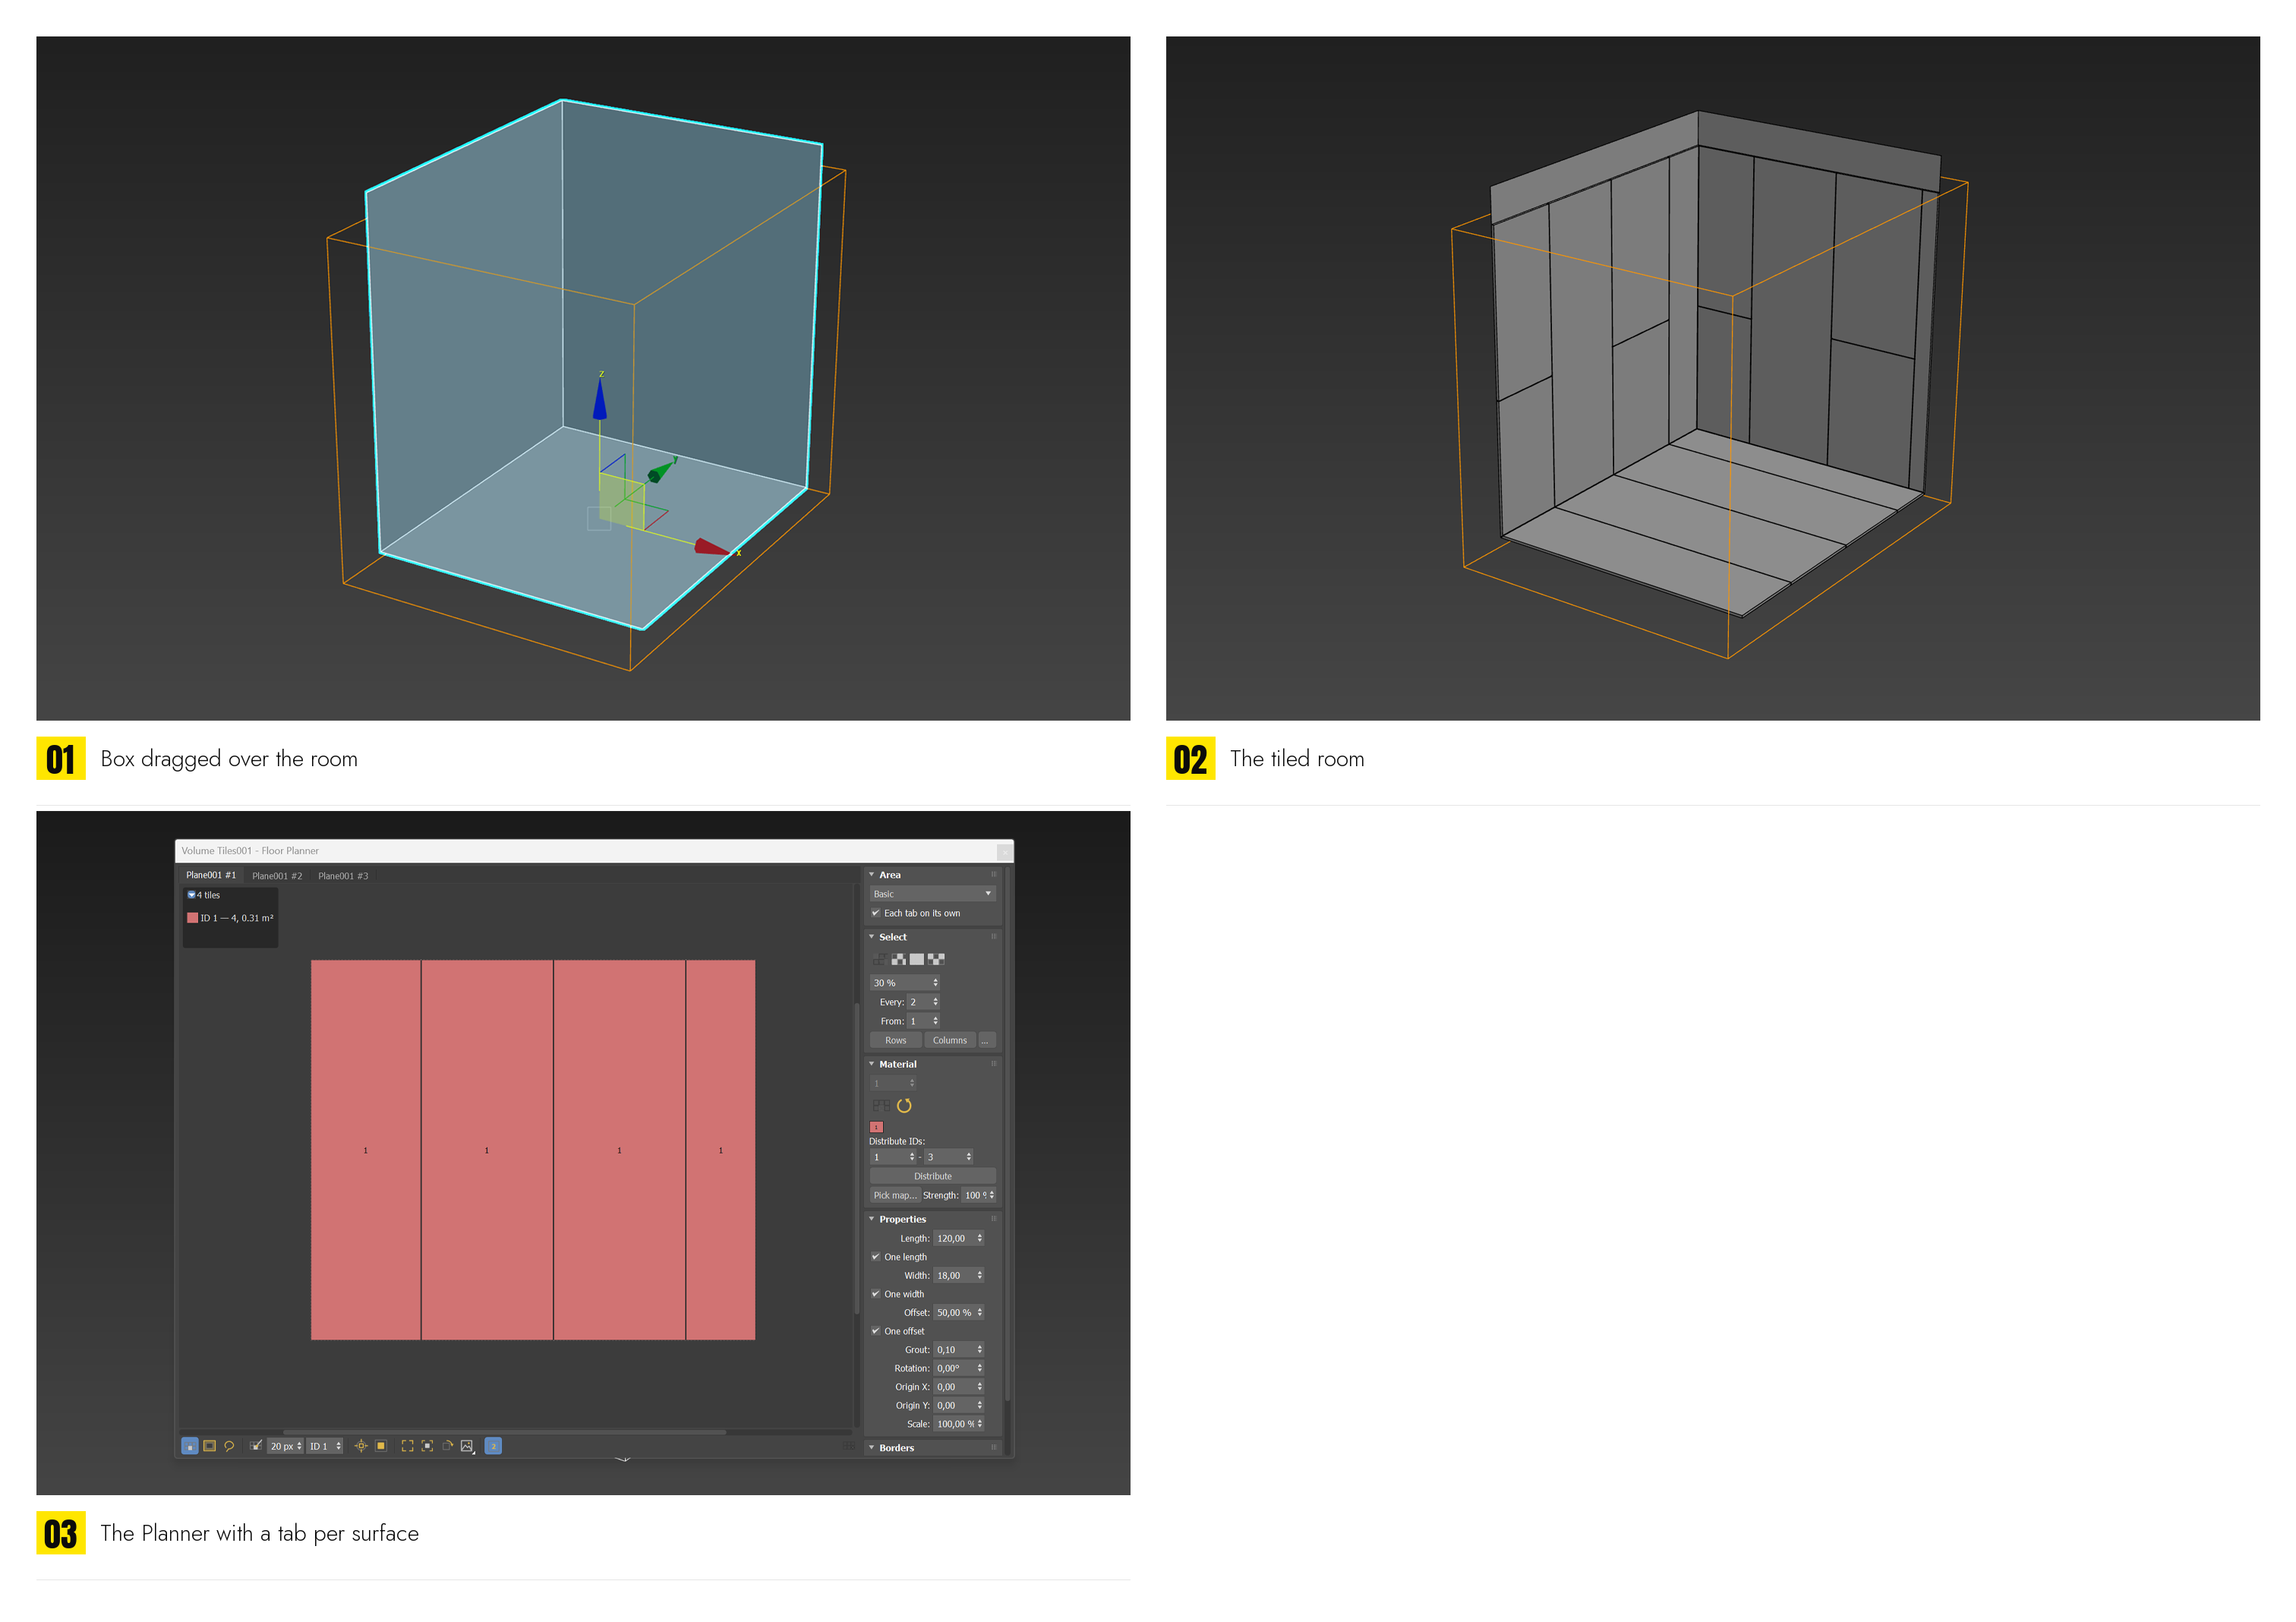
- Press Volume Tiles on the toolbar and drag a box over the room: base, then height.
- Add furniture, lights and helpers to the Exclude list. Add windows and doors with Cut openings for them on. Alternatively, switch to Include and list only the surfaces to tile.
- Set Pattern and Properties as for a floor. The rows apply to every surface.
- To change a single surface, open the Planner and select its tab. With Each tab on its own on, the surface gets its own rows.